
More fun with deer hair…
When my wife calls it gross, it think that is a pretty sign it will interest a big old bass!
Posted in Fishing, Fly Fishing, Fly Tying, Nebraska, Postaday, tagged Deer Hair Fly on November 5, 2013|
More fun with deer hair…
When my wife calls it gross, it think that is a pretty sign it will interest a big old bass!
Posted in Blogging, Fishing, Fly Fishing, Fly Tying, Nebraska, tagged Deer Hair Poppers on October 15, 2013| 3 Comments »

I decide to attempt a huge leap forward in my fly tying this week…
This weekend while at Scheel’s in Omaha, I browsed through their fly fishing section and came across some deer hair popper flies. I believe these are the coolest looking flies that someone could fly. My experience with deer hair up to this point was only a couple of muddler minnows about a year back… and they came out so-so.
I figured deer hair flies were above my skill level. That is until my wife walked by, saw what I had in my hand, and commented “that one is neat.” Then the competitive side of me took off and said “Neat huh? I can do that…”
Above is my first attempt. Not bad; although if you look close enough you can can see the stumps of the rubber legs I attempted to tie into the fly… I broke one off and the others came out of the fly at all sorts of crazy angles… so I just cut them off.
Tonight I sat down and took a crack at it again. Deer hair fly number 2:

I have to say, for my second deer hair fly, I thought I did a pretty darn good job.
So I kept tying… Deer hair fly number 3 on the left (next to number 2):

Three flies, and I think I have the process perfected.
And I only stabbed myself on the hook point once while I had flies in the vise tonight…
There are two things that I love about fly fishing. The first is how involved you can make the experience. The second is how there is always something new to try… a new fly tying pattern, and new technique, a new species of fish to chase. The hobby constantly finds new ways to stay fresh and challenging.
And what takes a few minutes to learn, takes a life time to master.
See you hunched over the tying bench, covered in pastel colored deer hair…
E
Posted in Fly Fishing, Fly Tying, Nature, Nebraska, Postaday, tagged Largemouth Bass on April 13, 2013| 4 Comments »
Since I have had a lot of luck with largemouth bass lately, I thought I would update my “Flies For” series with my favorite bass flies. Plus I get a ton of blog hits on my pages dedicated to my flies; so it is also good for my blog. I will also add this post as a page at the top of my blog…

Largemouth Bass are one of my favorite fly fishing targets. They can be challenging to catch at any time of the year, even the little fish put up a huge fight, and the big ones make for life time memories.
For me, finding largemouth bass is usually a practice in trial in error… As a rule of thumb, early in the season I fish areas with underwater structure. Submerged trees, rocky points, breaks in the lake bed… this time of year lake maps are invaluable to me. I also try to look for areas where smaller fish would be staging or spawning… like bluegill. Also important is the weather… when it comes to early season bass, I almost exclusively fish areas of the lake with the wind blowing in my face; as general logic would say that everything gets blown to that side of the lake… the algae, followed by the minnows, followed by the small predator fish, then the large predator fish… like bass. I almost exclusively fish the bottom or middle of the water level this time of year. Of course, remember I am in Nebraska where early fishing season still has very cold water… so these strategies could be different at lower latitudes.
Summer and fall fishing strategy is closer to classic bass fishing. I focus exclusively on ambush points… weed beds, submerged trees, any place a bass could hide. I prefer to fish the top of the water; nothing beats watching a bass exploding through the water on a popper fly. I usually start I in the middle the water table, and then alternate fishing top water flies over and around weed beds; and bottom bouncing flies around breaks in the lake bed close to weed beds and structures. Shallow water is a bass angler’s best friend, especially if it is close to deep water hide outs. In the summer and fall, early morning and sunset are the most productive times for me.
Flies For Largemouth Bass Fishing
And just a disclaimer again… These are the flies that work for me in Nebraska; not an exhaustive list of all possible bass flies.

The Clouser Minnow:
The Clouser Minnow is above and by far my favorite fly for bass fishing. I tie it in many colors, but the yellow and orange pictured above is my standard. When I go bass fishing, I usually carry two fly rods with me. One always has a Clouser Minnow tied on…
The Clouser Minnow is great for the fishing the mid to bottom of the water table. It is a great searching pattern for bass, and is my number one producer.

Topwater Poppers
My favorite bass fishing is top water bass fishing. I have two standard patterns… The large bass popper tied in a frog pattern (pictured left) and the small panfish popper tied in any number of colors and patterns (pictured right) also works well. The panfish popper also has the benefit of attracting some large bluegills too…
Pictured middle is the foam frog I learned to tie this winter. It is untested, but I have high hopes for and plan to fish heavily this year…

Bottom Bouncing Flies
Finally, I like to use bottom bouncing flies. These are great for fishing deep water and for days when the weather drives bass deep into the water column. Depending on the depth of water being fished, a sinking or sink tip line might be necessary.
My three go to flies in this situation are heavily weighted Woolly Buggers (pictured left) tied in any number of colors; but always in large sizes… size 2-4. In the middle is the microjig, my favorite deep water fly for a variety of situations. Finally, there is my “leach” pattern; which is a essentially a woolly bugger, minus the hackle. The biggest difference is that all of the weight is tied at the front of the fly so it sinks head first. I like to fish it similar to how spin fisherman fish Texas-rigged worms.
Good luck, and tight lines!

Posted in Fishing, Fly Fishing, Fly Tying, Nature, Nebraska, Postaday, tagged Bowling Lake, Largemouth Bass on March 16, 2013| 4 Comments »

 Snuck out for a few minutes yesterday…
And snagged my first open water fish of the year! Open water fishing is ON!!!
No time for a long post today, because I am heading back out to chase the stocker trout at Holmes Lake.
Here’s to the 2013 fishing season!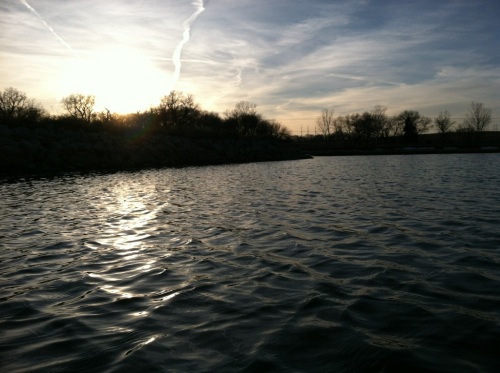
Posted in Fishing, Fly Fishing, Fly Tying, Nebraska, Postaday, tagged Foam Frog on February 27, 2013| 6 Comments »

I posted a picture of a pile of foam frogs that I made during my snow day last week… after some positive feedback that the flies did in fact look as cool as I thought they did, I decided to throw up a fly tie for them!
I didn’t invent this pattern… I don’t know who did. I was just searching on Google Image Search looking for “foam frog flies” and a photo similar to this popped up. It didn’t have tying instructions, but I have gotten good enough at fly tying that I can recreate a fly just from one picture.
That is a pretty good feeling when you are fly tying!
I love foam flies, but I haven’t found a lot that have been extremely useful; except for some tiny foam ants, beatles, and bugs. I have high hopes for this foam frog. The last foam frog pattern I tried was a flop (despite the YouTube video praising it)… but I have the feeling this one will be MUCH better.
I intend to use this fly fishing for bass around heavy cover; similar to how a spin caster would a regular old top water frog. I didn’t tie weed guards on this fly, but they could easily be added.
Materials:

Hook: Mustad C52S BLN Size 2 (although if I had a fly shop closer, I would probably get a larger hook…)
Body: Sheet foam with sticky backs, red and green
Tail: Red Marabou
Underbody: Red Chenille Cord
Legs: Rubber Legs (I prefer a stiffer leg)
Eyes: Googly Craft Eyes
Step 1:

Cut two equal size pieces of craft foam about 3 inches by 3/4 inch. Remove tape on both pieces and stick back to back.
(The only tape measure I had handy was the one in my fly vest… that is a little rusty. Sorry…)
Step 2:

Run the hook through the foam; with the red piece of foam toward the eye of the hook.
Step 3:

Put hook in vise and tie on thread behind foam. I find it much easier to keep foam in the horizontal position for most of the tie.
Step 4:

Add marabou tail at the end of the hook shank. After it is secure, I half hitch the thread to seal it off and remove it.
Step 5:

Push the foam body over the newly wrapped thread. Reattach thread at eye of hook and work back to foam.
Step 6:

Tie in chenille cord at the foam.
Step 7:

Wrap chenille cord forward to about 3 head spaces short of the eye. Secure chenille to hook and remove excess.
Step 8:
Tie in several long strands of rubber legs using a figure 8 tie. I like to tie it in right on top of the end of the chenille cord. Make sure that your legs will stretch well beyond the end of the fly (I like having them end about where the tail ends).
Step 9:

Rotate foam vertically and carefully pinch down. Be careful not to scratch the foam on the hook point!
Step 10:

Carefully start wrapping the thread around the foam to hold it together and form the head of the fly… this is above and by far the most difficult part. The first couple wraps should be light, and each wrap should get tighter. I like to make two wraps at a time; then carefull add pressure to the thread to pull it tight to the hook shank. I will do this 6-10 times as needed. Be very careful not to break your thread as you apply the pressure! (If you do break your thread, you can reattach right over the top of the thread; just make sure you give youself several wraps before applying pressure again, and make sure the broken end is secure under the new wraps). Secure the thread with 2-3 half hitches and remove thread.
Step 11:

Trim the top and bottom parts of the head so they are even. The “lips” should form a nice “V” pattern.
Step 12:

Foam flies always have a habit of rotating around the hook shank; or at least mine do. I like to secure the foam body to the hook shank by apply a “healthy” amount of supper glue to the back of the foam body. I apply glue directly to the hook shank on both sides of the fly; inside the foam body.
Step 13:

Apply craft eyes to the top of the head. I like to use a drop of super glue here too; to help secure the eyes to the fly.
Step 14:

Using a Sharpie, add black spots to the body of the fly. I like to add spots to the top and the bottom of the fly.
Also, make sure that the eye of the hook is centered in the fly’s mouth. If it is not, you can apply gentle pressure to the body and the hook eye to adjust the location.
After this, just tie on to your favorite bass fly rod and hit the water!
Or wait until the spring, and then hit the water…
That might be more productive!


You must be logged in to post a comment.